Wednesday, December 30, 2009

Again I'm reminded that this garden does not need me.


When I came home from almost dying during my super icy morning run (I've now got a pair of YakTrax - thank you Lesley for that one) I went out and found my garden covered in an icy death crust that I was sure meant that I'd soon be facing a bunch of vegetable beds of brown goo where my pretty green plants used to be.

NOT SO.

When the ice thawed and I found my way out to the beds in the daylight hours, I found that the only plants to have gone to goo from the frost were the nasturtium, which was no big surprise.

They do this every year and it is, in fact, their job to turn to goo and cover the soil until spring when they get dug under and TEE DAH the soil springs anew.

It is the circle of life thing. Sing it if you want. Just not around me. Thanks so much.

Everything else though, including the icy little pea tendrils which I was certain were going to cuh-roak under the ice, was AOK.

In fact, if I didn't know better, I'd think the frost did them some good. Like, made them sure that it was their season and time to grow because they were safe from the summer vegetables that are always rushing them in and out of the beds because the summer vegetables are totally the teacher's pet. Where the teacher is me and I keep pets like tomatoes.

You understand.

Anyway, the kumquats, lemons, peas, purple kohlrabi, broccolini, leeks, garlic and fava beans are out of harm's way for the moment and have been enjoying some winter time rains while we've been enjoying the winter time snows.

It's all just very whimsical and growie out there. Which, of course, means that I am intermittently waxing my snowboard and flipping through seed catalogs.

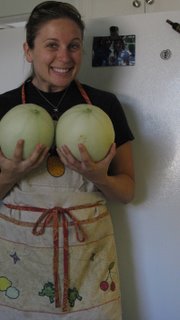
I won't spoil the fun of 2010's Adopt a Crop, but I think I found the perfect melon. And it's not even one of my own! HA! My jokes have not improved!

So, because I came here, not with the intent of torturing you with my inane sense of humor, but rather to show you pictures of the plants I did NOT kill - let's see these mystical creatures:

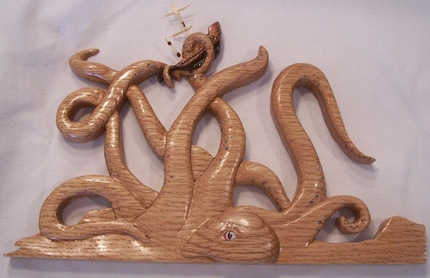
Money Chicken asked for a scarf for Christmas. Notice he is still nude because he is a naughty little bastard.


Garlic - Alive+


Kohlrabis - alive and some are very purple.


Peas - alive with tendrils AND fancy rain drops.


Lemons - obviously alive. Not even a mad shearing can kill this tree.


 As Bubba would say, the kumquat is "quatting":


So, now that I know that all this shit can live without my intervening with a floating row cover or other device that requires me to remember I have a garden growing out there when it's 30 degrees outside, I feel free to go about my business ordering seeds for a summer garden and riding around on the slopes of Tahoe without another thought to the vegetable garden.

I mean, sure, I'd like to eat some broccolini or kohlrabi one of these days, but while they're not dead out there, they're not really growing all that fast either, so I'm not going to get super worked up for that.

Though, when these kumquats come ripe, which I WISH THEY WOULD ALREADY, I will eat all 11 of them in one standing and I won't even feel guilty about it because it's not like there's a full dozen or anything. Who could eat 12 whole kumquats at once? Ridiculous.

Monday, December 28, 2009

De-Crapping [Tutorial]

Do you know what being in my house for extended periods of time makes me want to do?

De-crap.

Like, de-stack my living room of old magazines. De-stuff my dresser drawers propped open by clothes not worn in recent memory. De-pile the books emerging from beneath large pieces of furniture.

De-stick the cupboards stuck closed because some errant and unused wok utensil decided to get wedged all the fuck in there on top of all the other long-handled utensils so that when I went to get the big tongs out I had to engage in a battle royal with the kitchen cabinets to the tune of jamming my arm up the back of the drawers to dislodge the offending spoon thus rendering my left arm useless for the better part of Christmas Eve.

And then de-redundant the kitchen counter because TEE DAH! Bubba got me some sweet new knives and now I am complete in the knife way for the rest of my days and can return the coutertop to things other than a big knife block and rest my brand new SHARPASFUCK knives in the forthcoming in-drawer knife organizer. Yay!

I drag along behind me, to these occasions of great reckoning, two bags. At the end of the day, one of the bags goes in the trash, the other goes to Goodwill/Hope Services/Salvation Army/The Donation Center Most Conveniently Presented at the Close of De-Crapification.

And once the de-crapification is done, the organizing can begin. And I think we all know that I love organizing.

Lawdie do I love it.

Look at that - only unread books. I *knew* they were in there. 


To open a drawer and, rather than see a random assortment of items all knotted up in hellfire and rubber bands, I see an array of useful things organized in a way that will allow me to, first, easily choose the thing I need and then, second, close the drawer without having to play chicken with the stuff that pops up in the front by pushing it down with my hand until the last possible second when I pull my hand free and slam the drawer closed SUCCESS. Phew.

I crown myself Queen of Long-Handled Utensils. Also, please enjoy the apron drawer.


Yes. That is a good moment. And when I can spread that good moment throughout my house after a successful round of de-crapification? I get all annoyingly gleeful and satisfied in a way that makes me question my sanity and what's wrong with me that something this stupid fills my soul with joy.

 De-crapping this nighstand took a whip and a chair.


So, my life is small.  But you knew that.

And thank you, Hope Services, for delivering a yellow "We'll be at your house on such and such a date to pick your crap up" card to our mailbox today. You are the official Donation Center Most Conveniently Presented at the Close of De-Crapification and therefore win the coveted Sack of Indiscriminate Bullshit. Enjoy.

For those of you wading through this mess of a post for a tutorial - here you go. It's a shortie.


Another thing to do with old cards: Thank You Postcards


Pick the good ones
Sift through your pile of old cards and pull out any that fit the profile:
  • Any that say Thank You on the front or have a pleasing design
  • Aren't destroyed in some way
  • Don't have a lengthy note scribbled on the back of the cover
  • Are between 3 1/2"x5"  and 6"x4 1/4"


Save the good part
Cut the card in half - recycle the scribbly half (and also absorb the thoughtful message, fine)


Say Thanks - Version 1
Scribble your own thoughtful thank you message on the blank left side of the back of the cover.

Send it away - Version 1
Put your address on the right side there,add a $.28 stamp and put it out for the mailman who may or may not have a searing case of Queso Gas.

Say Thanks - Version 2
Scribble your own thoughtful thank you message on the blank back of the cover from corner to corner.

Send it away - Version 2
Slide it into an envelope, address it like you normally would, add a $.44 stamp and put it out for the mailman who may or may not secretly love you for introducing him to Skillet Queso Dip regardless of any aftereffects.

And then you can bask in the super de-crapified glory of your organized house. And read a book from the unread pile, maybe What the Dog Saw.

Wednesday, December 23, 2009

Happy Day When You're Not Working. Hopefully.

Surely you didn't think I'd forgotten my favorite holiday pastime of berating holiday decorators.

I mean, really now. I live for this crap.

So, before we disband for our traditional fried chicken (homemade, of course) dinners, stockings stuffed with booze and observing of other people's holidays on the slopes of South Lake Tahoe, let us first enjoy an excellent example of why I refuse to succumb to the delusional cries of those who wish, "I'd just get in the holiday spirit, already."

Because if *this* is the spirit, I want no part of it.

This time in motion picture with sound.


And in case you were wondering, this is the house to which I've been referring and pointing my middlest finger.

Happy Day When You're Not Working. Hopefully.

Monday, December 21, 2009

Door-mounted organizer from inner tubes [Tutorial]

When left to my own devices to entertain myself, my day usually includes all or some of the following:

Running
Taking the dog somewhere beachy or mountainy
Eating Wendy's or In N Out for lunch
Watching 80s movies
Crafting
Cooking
Generally fucking off

This past weekend Bubba was out of town, thus leaving me effectively to my own devices, during which time I did all of the above. (In order: 6 miles, mountainy, Wendys, Say Anything, Not a $20 Bill Mini Wallet, turkey chili, playing Abduction) Plus, my other Best If Done While Unsupervised activity - Settling Annoying-Ass Household Debts.

The debt in question this time turned out to be the kitchen sink cabinet because it's been haunting me in that well-known Surely You Can Do Better Than This way for some time. But it wasn't so bad that I was ever inclined to do much about it because oh who just gives a rat's ass what it looks like under the sink anyway?

Right?

I would have agreed with you 100% up until this past Sunday morning.

See, my fab cousin gave me some new fab orange kitchen towels for Hanukkah on Saturday as part of our yearly kitchen towel swap and when I went to put them into the raggedy-ass basket that lives under my sink and serves the purpose of holding all Towels in Waiting, I found myself not wanting to subject the new pretty towels to the ugliness of the cabinet and all of its crappery.

Yep, that's right, I feel bad about making new towels sit in an ugly basket in a messy cabinet, so don't ever call me insensitive.

But at the time I was putting away the towels (and the not-to-be-forgotten-and-also-lovely towels from my sister), it was nearing my bedtime (and the next showing of Star Trek III: Search for Spock - don't you judge me) and I didn't have the wherewithal to contend with cabinet ugliness, so I just shoved the new towels in there, shoved the old towels in the dog's rag bag and went about arranging myself in bed for some prime Spock Finding.

Towels thusly forgotten, I focused my attentions on supervising the bridge crew returning to Genesis for Spock's body and fell asleep in the middle of the bed, which is another thing that happens when Bubba's out of town. I, however, do not use his pillow because that seems weird.

Anyway - when I woke up Sunday morning OH MY GOD I was on fire to redo the kitchen sink cabinet.

Seriously.

I couldn't walk the dog fast enough to return to the house and begin to make real the very clear vision in my head of how that cabinet should look and function which was obviously something my brain had been working really hard on while I watched Captain Kirk grow ever rounder and slept to the tune of Jada's dog snores.

It's strange what my mind does when I'm not awake to supervise its activities.

My mind had come up with some good ideas, too, if I can speak for it, so before I knew it I had removed all the cluttery, cleaned and painted its interior, gone on a junket to Target for organize-y things despite the ALL HAIL CHRISTMASness of that fucking place and returned to create an excellent door-mounted bag organizer from some of our old bike inner tubes.

Before: Total shame.


After: Triumph by inner tube


And so, I ended up creating a suitable living environment for my new pretty orange towels, the Now Larger For All Your Chard Disposing Needs! composter (that steel canister), all my paper bags and the other miscellany that likes to rule beneath the cover of the kitchen's plumbing.

And in the event that you, too, want to create an excellent door-mounted bag organizer from some scraps of bike inner tubes and a few staples, follow these short instructions:

Gather together your materials:
One road bike inner tube (preferably busted already so it's mostly useless)
One staple gun with at least four staples
A pair of scissors or other suitable cutting device

Identify the door onto which you will mount your bags.
Hold up your biggest bag (folded) to make sure you're picking a good-sized door for this. Or, just recycle that big-ass bag because who really needs it anyway?

This is the side of the cabinet I chose to adorn with the organizer. The door is hardly visible, but I trust you know it's there.


Staple down your first strap.
Triangulate the center of the future bag-holding area and make marks about 1-2" in from the edges of the door. MAKE SURE THE DOOR IS THICK ENOUGH AT THESE SPOTS TO ACCOMMODATE THE LENGTH OF YOUR STAPLES OTHERWISE THEY COULD COME POKING OUT ON THE OTHER SIDE. JUST SAYING.

Staple down one end, holding the gun to shoot the staple out vertically, to the first spot then stretch out the inner tube so that it's stretched beyond the point of your next mark and staple that down, too. You want this thing taught, so don't let it be all flappy and loose. Ew.

Trim excess.

This was before I trimmed the excess.


Staple down your second strap.
Triangulate the ideal spot for the bottom strap and follow the instructions for the first strap from "make marks about 1-2" in from the edges." Don't forget about that making sure the door is thick enough thing. Just trust me on this.

The bottom strap is key. It keeps the bags from sproinging about. Which I promise you don't want.


Load your bags in there.
Rejoice! They're not all floating around annoyingly with all your other cabinet bullshit! WOO! And, hey, you have a really big gift bag for some future birthday haver! Woo! I hope they don't read this blog because then they'll know their gift bag came from my kitchen cabinet and that's kinda ew.

Sorry!


And now I shall commence making another cord basket for those towels because what you don't see in this photo is how the other side of that basket is totally broke down and crying out to be a garden basket until such time as it's hurled into the Big Composter in the Sky which is actually the Big Composter in my Backyard.

Updated: The aforementioned cord basket. Nice.


Friday, December 18, 2009

Not a $20 Bill Mini Wallet [TUTORIAL]

Yeah, so, you know how when you go out with the three dimensional people for activities like drinking in a bar or drinking in a house or drinking in a country club because that is where people sometimes have weddings, you might swap out your normal Big Girl Purse for, say, a smaller more demure clutch?

Or maybe you're one of those whores who just ditches the purse and shoves all your necessaries down your cleave or maybe in your back pocket if you're wearing jeans loose enough to accommodate a layer of plastic.

And you're faced with that moment of What the Fuck Do I Do With My Credit Card and ID and this $20 bill just in case some rube bar doesn't take Visa?

Yeah, you know this moment in the Preparations for Going Out.

And, if you're me or like me or like most bitches I know, you take that $20 bill, wrap it around your ID and credit card and either throw it loose into your clutch or slide it into your back pocket, just tempting fate to come ruin your night by having these crucial items go missing. Or what if they get demagnetized? Does that still happen if the magnetic strips touch? I don't even know.

But, if you've had those moments and you're annoyed by them and you resort to using things like hair bands or binder clips or barettes or complicated currency origami to keep your necessaries together, this tutorial is for you.

Because this mini wallet, which is NOT A $20 BILL (see, worked that name in there so you could make sense of the title. You're welcome.), fits nicely into most clutches and super small purse things as well as your back jean's pocket provided you've left a little breathing space in those 7s for a thin layer of fabric and plastic.

If you're me, this is rarely an option because, friends, my jeans - they are tight. Yeouch.

Anyway, this is not about my questionable attire, this is about making sure that you have the means to pay for all those cocktails and, at a later hour, the necessary snacks and maybe, at an even later hour, some questionable entertainment on one of your city streets with lots of flashing lights - but that's not important. The important thing is that you do it with grace and style.

At least the amount of grace and style that can be garnered while you quickly and easily locate your Visa despite your crossing eyes and half-exposed rear end.

Moving on.

Not a $20 Mini Wallet Tutorial
 

Materials

2x 8x5.25" main pieces from main fabric
2x 6x5.25" pockets from contrasting fabric
1x 4.5x5.25" pocket from contrasting fabric
1x 4.5x5.25" pocket from main fabric


Step 1: Press the pockets


Fold the smallest main piece and two contrasting pieces in half horizontally and press.


Step 2: Sew the pocket piece

Place one of the large main pieces right side up and pin the smaller folded pieces, lining up raw edges and stacking the small main piece on top of one of the contrasting pieces as seen here.

Pressed edges should be to the middle of the main piece.

Sew a 1/4" seam around all edges.

Step 3: Attach the back

Place the other large main piece on top of your just-sewn pocket piece, right sides facing, pin and sew a 1/2" seam, leaving one short side open.

Step 4: Turn right side out
That's all. Just turn the thing you just sewed on three sides ONLY, right side out and press.

OK. So you had to press, but you get it. It's easy.

Step 5: Finish your wallet

Fold in half, lining up short edges, pin in place and sew a 1/4" seam around all sides, being sure to fold in and press the bottom edges for a clean finish.

Step 6: Load it up and hit the bars. Or whatever.
Your ID, credit card (even a non-Zappos one, though I don't know why you'd bother) should fit snugly on one side and your cash should slide in easily on the other when it's folded in half.

Like you can plainly see here.


So, from where I stand, it seems like you're ready to jump off the roof into your awesomest 7s and hit the town without dropping your Zappos card on the dance floor as you attempt an iffy move to show off your quad prowess and/or whale tail.

And don't even be telling me you don't know what a whale tail is because I know you've witnessed them thanks to the Supah Low Jeans trend which has yet to dissipate. Not that I'm not guilty of this horror, I'm just saying, I have rekindled my love with my belt collection and everyone is the better for it.

So, like, wear a belt and carry this wallet and maybe when you're out drinking your face off you'll make less of a horse's ass of yourself.

OH! And if you have a friend who falls victim to this sort of thing, and you still need to make her a gift for the holidays, you could make one of these up real quick like from leftover scraps in your stash and save us all a little eyesore in the new year.

And, if you have a friend that fits into any of the following categories, this thing might be good for them in the following situations:

New mom/Diaper bag wallet
Retired mom/Park walking wallet
Commuter/Laptop bag wallet
Student/Backpack wallet
Dog owner/Dog park wallet (hello, this is me)

Updated!:
Hiker/Don't get lost without your ID wallet
Snowboarder/Lunch costs $50 at Heavenly wallet

Yay.

Wednesday, December 16, 2009

To get you all in the spirit

After that one post where I railed against society for leaving the designing of Hanukkah decor to basement-dwelling monsters, I'd like to say that I made peace with the situation and moved on to more productive endeavors like, say, designing something more aesthetically pleasing to prove that it could be done.

Well, I can't say that. Because that's not my way - to go out into the world making right what is wrong. No, my way is to bitch about it.

Which is why you see a label on this blog called Finny Bitches and not one called Finny Fixes.

It's a character flaw of mine which I've fully embraced. I figure, why fight something that comes so naturally?

Anyway.

What actually happened after I ranted about the aesthetic abuses laid so heavily on Hanukkah decor was that I went on to find more fuel for the fire. Meaning, I went to the internet to hunt down even more ugliness. Just to prove to myself that there was, indeed, some sort of awful theme running through Hanukkah decor outside of the few examples I easily found and linked to from my post.

Well, HO HO, was there ever some ugliness to be found. WOW.

Though I found that the most egregious missteps were to be found in the menorah department.

This is the department where, if you're a Jew or someone who knows a Jew or someone who's marketing a product to a Jew and wants to appeal to every type of Jew on the planet and needs an outlet for kitsch where one can express all of one's alliances through a single holiday vessel - you come to let your hair down and really Be Yourself with the innocent and unknowing menorah.

At least that's what the menorahs out there are telling me.

Particularly the cat ones and the Harry Potter ones and the Mel Gibson ones (though the irony here is intensely satisfying and also no one's really taking this one seriously).

I'm going to go out on a particularly precarious limb here and say that people are treating menorahs like some treat their Christmas trees - all decorating them up to be a unique and authentic representation of themselves and their most honored and random-ass pastimes.

Much like the golf-loving father may have a golfing-type ornament for their tree, a golf-loving Jew may also have a golf-themed menorah.

Like high heels? If you celebrate Christmas, go here. If you're a Jew, go here.

Vespas anyone? That random enough for you? Christmas-havers. Jews.

My point is this - while Christmas and Hanukkah may be different holidays celebrated by different religions and different people doing different things while filling themselves to the brim with different not-so-good-for-you foods, the decor can be equal (and mystifyingly similar) in its ugliness and at the root of it all everyone is overdoing it.

A point I've been trying to prove all week on Facebook as I've been celebrating a new holiday called The Festival of Ugly Menorahs which I'll share with you now. Enjoy.

Festival of Ugly Menorahs : Night One
The Sea Monster Night

Festival of Ugly Menorahs : Night Two
The Special Holiday Visitor Night
(Hint: those are tampons)

Festival of Ugly Menorahs : Night Three
The Inflatable Night
(This thing is 6 feet tall and goes on your lawn)


Festival of Ugly Menorahs : Night Four
The I Had Too Much Manischewitz and Spent Night Three in the Loo Night


Festival of Ugly Menorahs : Night Five
The Musical Night When Our Ears Also Witness The Ugly

(Hint: This menorah plays Klezmer)

(Hint: Klezmer is Jew music)

(Hint: Think clarinets and accordions)

(I think you get the ugliness now)

Festival of Ugly Menorahs : Night Six
The Night of Holographic Ugliness
Nights 7 and 8 are yet to be revealed as they have not yet occurred, so I will spare you the final days. Perhaps, if all goes well and I find some particularly stunning gems, I will share them with you as I ready my latke-making outfit for the final night's festivities.

And, before you comment and ask me what the fuck a latke-making outfit might entail, I will tell you that it is not fanciful, nor does it include flashing lights, inflatable accessories or outwardly visible tampon strings (no, that's for beach whoring. And, ew.)

My latke outfit, as it's commonly known around my family, is a black cotton v-neck sweater, jeans and low-heeled boots (2 inch heel max) with gel insoles. One must always be Gellin' when one is Latke-Makin'. Or something like that. Also important are the breatheability and cotton-ness of all items of clothes because that means that they are washable in HOT water and don't shy away from two tons of detergent.

Because you will smell like a nice crispy french fry when you're done frying enough latkes to feed any Hanukkah crowd and the smell will haunt you unless you go home and immediately burn or thoroughly wash with scorching water and soap all of your clothes from that day. You should also take advantage of the "Repeat if necessary" option on your shampoo, shave off all exposed hair, hose yourself off with Purell and commence a week-long diet of kale and purified water until the latkes have been expunged from your soul.

It's an effort, I won't lie to you.

So, if I get through all of that without accidentally lighting myself on fire (which has some implications I won't go into due to the super pissing-off-of-random-people-ness it provokes) during the lighting of my parents' traditional and not-ugly menorah, I may come back here and share with you nights 7 and 8.

If I don't, well, you can assume I've had all I can take of Hanukkah, menorahs, ugliness and smelling like a french fry's armpit and have moved on to other things. Like figuring out how to get through Christmas without yanking down my neighbors' musical manger display running amok next door.

Monday, December 14, 2009

Two more things to do with old cards


So my post title is totally uninspired - don't let that deter you from reusing some more of those old cards that I'm sure you have hanging around after my last three years of Save Your Cards For Other Purposes hysteria.

You do, right? Have a big old pile of cards from this year, including some holiday ones from Holidays 2008, that you are getting ready to pitch because your 2009 cards are coming in through the mail?

I knew it. Because so many people love you that they keep sending cards. Love that.

I mean, I love that now.

Now that I have the super fancy Card Holder Thingee (hey, leftover ribbon from an Amazon.com box can be fancy) to handle the incoming cards. Before the Card Holder Thingee made an appearance in our house, I would go through three very distinctive card having stages.

1. Excitement - There's something in my mailbox and it's not a bill for supplemental taxes - RE-FUCKING-JOICE.

2. Uncertainty - Now that I've opened this card and enjoyed its message, where will I put it so that Bubba can also enjoy the message that may or may not include a newspaper clipping or printed out email from a not super tech-savvy relative? Does it go on the mantle where a breeze may blow it into the fireplace? Does it go on the entry table with every other goddamn thing?

3. Guilt - After having just put the card on the table for the requisite week so that all inhabitants could have adequate time to appreciate its beauty and/or decode the meaning of the enclosed newspaper clipping, is it OK to throw it away or is this sender of cryptic newspaper articles going to hunt through my house to find their card shrine next time they visit? Because if that's the case, we need to move, disassociate ourselves with this person and change our identities. In that order.

But with the Card Holder Thingee, thankfully some order was introduced to my life, and insodoing, also some peace. And we haven't disassociated anyone, though it's up for debate as to whether they'd care.

When we get cards now - throughout the whole year - they get appreciated from the mailbox to the table, where they may sit for a day or so - and then pinned gracefully to the ribbon, where they will hang adored until the next holiday when they're torn asunder and turned into some variety of craft.

Or used to scrape out the pee cement adhered to the bottom of Rocket's litterbox.

I'm just saying - sometimes I need a rigid tool for the job and I don't own a scooper because I just dump the litter all at once but sometimes the litter has formed an immovable mass which can only be dislodged with a rigid object and sometimes that object needs to be cardstock and sometimes the only cardstock around is a big ugly card with somebody's kid on it.

It's OK. Feel free to use my cards to scoop out your litter boxes, too.

And, HOORAY, that's an unintended but totally legitimate 3rd Thing To Do With Old Cards that I hadn't even meant to include because I thought you'd all hate me and/or stop sending me cards.

Well, whoopsy. It's out there now, so I hope you can still love me enough to send me cards so that I can appreciate them on the Card Holder Thingee until such time that they're either recycled in a cat pee-free way or, you know, the alternative.

Moving on.

Thing #1 You Can Do With Old Cards: Wrap gifts with them.


If you have something small, like, say, a Going Out Without Your Big Girl Purse Wallet that you just crafted and are giving to some friends as a way to test out a new tutorial (coming soon), and you want to wrap it, but just not in that way where you're folding giftwrap around it and trying to not make it look like crap, try using a cute card instead.

Like so...

Gather your materials:
Glue stick
Old card
Ribbon
Scrap paper
Hole punch (not pictured because I forgot)


Glue your scrap paper over the inside of the card, covering up any sentimental notes or divulging of personal holiday secrets.


Trim the scrap paper edges, if necessary, and fold the card along its original crease.
Slide your smallish gift in there like you're filling a taco.

Punch a hole on one-side, making sure your item is in the middle of the card.
Then punch a hole on the other side and at the top.
Thread ribbon through all three holes and tie a knot. Or a bow.
If you're fruity like that.

See how it is all snug in there?
And you're done. Wrapped. Ready to go.


Thing #2 You Can Do With Old Cards: Make Gift Card Holders Just Like Target. Or Whoever.

Gather your materials:
Old card
Gift card for Chili's or something fancier because you really treat your mailman nice unlike us WT folk
Razor blade
Envelope to fit


Open the card and tear it in half, severing front from back. Scary.

Center your gift card on the old card's front, design side up, and make marks around your gift card at each corner, about half an inch up each corner, with your razor blade.


Move the card away and connect the corner lines, bottom line to side line.
Slide your gift card's corners into the slits and then the card into your envelope.
Feel free to put a fruity stamp on the envelope and maybe write a little note on the card so the mailman knows to whom he should deliver a bag of flaming poo when he realizes you gave him $10 to Chili's instead of the C-note he'd had his heart set on.
Greedy bastard.

Then, if you're like us, do this with all your gift cards and set them out in arm's reach of the front door so you can catch the UPS guy during one of his visits to your front door and give him the gift of Skillet Queso this holiday season.
Because nothing says, "Thanks for always putting my packages on the back doorstep so they're safe!" like an alarming case of Queso Gas.

And then there was that #3 Thing You Can Do With Old Cards that I said before, but you can just scroll up and read it there so that I don't have to talk about cat pee anymore. Barf. I can smell it in my nose now.

Happy Holidays.