Thursday, March 05, 2009

As if you needed another apron tutorial [TUTORIAL]

Look, I know there's a bajillion how-to-make-an-apron-from-a-towel tutorials out there, so I realize I'm not bringing anything new to the table, but I hope you'll still appreciate that I was finally moved to make one of these things and it's only because my mom is a supah sassy broad.

What?

Historically, I've done a very good job ignoring tutorials of this variety (not that I haven't made an apron or two in my day) because I've never been inspired by any towel to the point where I wanted to wear it around my house.

Call me crazy, but a brown coffee stained dishtowel just does not say, "Fun Home Attire" like, say, an oversized Tshirt from a local event might.

So, the towels have stayed in the kitchen basket, waiting for me to use them for mopping up a kitchen explosion or perhaps tears from when I'm wrestling with some onions. I assume they also get used for drying dishes per their god given name, but that's not my department.

Until last Hanukkah, that is, when my mom removed her censor completely and stopped trying to restrain her inner sassypants. Not that she's not a saucy lady all of the time, but she does a really good job of hiding it behind her "I'm the nicest gal alive" facade.

Needless to say, I didn't inherit this fine and useful trait.

Anyway, in and amongst some very thoughtful and lovely gifts (she knows me real well, this mom of mine), she stowed a spicy kitchen towel bearing a caption that everyone at the Hanukkah party thought was *oh just hilarious and perfect* for me.

Oh tee hee. Isn't that adorable that my whole family thinks I'm a bitch.

I guess the secret's out.

And when I got this thing home and came to terms with the fact that it's not just my blogging friends that know what a snarky bitch I am, but in fact my whole extended family, I decided that I should really own it.

And what better way to own a personal flaw than to wear it on your person? And then maybe wipe some of The Best Sauce Ever. Yep. accidentally across the front while explaining to your neighbors that your mom is actually quite nice but she drinks and then buys silly things that are totally *just kidding* and therefore here I am wearing a towel proclaiming my poor attitude.

Ah yes, our family is very refined.

What I'm trying to say is that this towel moved me to making an apron and now I will show you how I did it because it was really easy and I have used this apron a lot since I made it if only so that I can wear a bad word and a crazy lady's face while I make dinner and drink.

It's what you might call a Life of Balance and Priorities, my friends. Be advised.

And don't worry, this tutorial won't take NEARLY as long as it did for you to read the post so far. Sorry about that.

Finny's Naughty Towel to Apron Tutorial
Print this thing

Materials:
Kitchen towel
1/2" twill tape or ribbon in whatever color
Thread in whatever color
Fabric marker
Fray check

For the record, your towel needn't include swears.

To make:

Hold the towel up vertically (as though you were going to wear it like an apron, right?) and mark one horizontal neck strap line where you'd want one of the neck strap holes to be.

Then mark one vertical line on the side of the towel where you'd want the waist tie hole to be.

Fold your apron in half vertically, matching long edges, and mark the other horizontal neck strap line on the opposite side of the towel.

Along the long side of the towel, mark the other vertical waist tie line so that it matches up with the line you drew previously.

This is so that your neck strap and waist tie holes are equidistant from the edges, centered and all that jazz.

Can't have you all off-kilter and looking crooked in your apron made from a towel, that'd be ridiculous and also confirm everyone's suspicions that all you're doing in that towel is making gin cocktails.

I might have had a G&T *while* I made this. You'll never know.

Now, per the lines you just marked, set down at the machine and sew yourself four buttonholes, one for each line you marked.

I swear it gets easier every time. Really.

For the record, I only fucked up one of my buttonholes this time which is an all-time record for me. Also, no one was bleeding or crying when I was done, which is noteworthy.

With your buttonholes all sewn and happy, take out that twill tape and weave it through the neck strap holes at the top of your apron, starting at the back of one side, weaving through the front and back through the front of the other hole. This will create a little neck strap, which I'm sure you already surmised because you're smart like that.

I broke that necklace. Sad.

Swing that bitch over your head and pin the top corners of the towel back over the straps so that the straps are now contained in a nice little terry channel. At the base of this channel should be your two waist tie holes, so fold the towel corners accordingly.

You can also draw a sewing line to follow, if you're simple like I am.

Sew this channel and backstitch at both ends. This is because you'll be yarding on it when you're putting it on and fitting it, so you don't want any seams ripping free. That shit pisses me off.

Don't ever look at the back of my aprons, mom. Bad things. Bad things.

Once you've sewn the channels, feel free to cut off any extraneous towel. No one will know you took scissors to a fine and thoughtful gift unless you blog about it when you know full well that your mom reads your blog.

Hi mom. Sorry.

Now that you're all sewn and cut, weave your twill tape through the waist hole, through the side channel and up and around the neck holes, just like you'd imagine, and if you need a little help coaxing that tape through there, put a safety pin through one end because that's always helpful.

I always use a safety pin. Remember, SIMPLE.

You can trim the tape to fit and add some fray check at the ends if you're fancy.

Then, put it on and go make a cocktail. You'll need one when you try to explain why your mom "who seems so nice" gave this to you and how you're not really a bitch you just play one on the Internets.

Mmhhmm. Yes. That sounds believable. I'll go with that.

Wednesday, March 04, 2009

Peel garlic like a superhero + Kale Killer [RECIPE]

I should have a cape for this.

You know, I have only so much patience for people not recognizing my skills.

Like when, after many years of subscribing to Cook's Illustrated (thanks MiL!), I *finally* had a Quick Tip and was all excited to submit it to them and then what?

Nothing.

Moooooooooooooooooooooths later (2) and no mention of my fabulous mind-bending, life-changing Quick Tip in their big fancy we-know-everything-about-cooking magazine that I worship.

Boh.

As though they have jillions of backlogged Quick Tips that they're trying to fit into the 10 spaces in the monthly issues or something? Ridiculous! They only need mine!

Anyway.

I have a Quick Tip and if CI isn't going to share it with you then I will. Because it must be known! It is so QUICK and such a great TIP even if I do say so myself, which I do. Often.

And if they decide to share it years from now in their 10 bazillionth awesome issue then so be it. We won't be there to remember that it was mine, but the future generations will know and that will be enough. I suppose.

ANYWAY AGAIN - my Quick Tip, for your enjoyment.

Peel Garlic Like a Superhero

It's a bird! It's a plane! It's...I'll stop now.

First, I should say that I don't know what about this method makes it "like a superhero", except that I always feel fast and stealthy when I do it, and so, I call it "like a superhero", so just go with me. Pretend you're Superman in blue tights or something. Good fun.

Basically, the goal is to make peeling garlic so fast, easy and not requiring of extra tools (assuming that you're about to use a garlic press) that you'll have to wash, that when you're faced with a recipe (to follow - patience!) that calls for multiple cloves of garlic, you won't get all UGH but peeling garlic is so annoying and tedious that you just close the cookbook and take out the blue box of mac and cheese instead.

Don't do it! Try this instead and save mac and cheese for White Trash Cook Off Night.

1. Put your sheathed clove of garlic in the press.
That's right - with the peel still on it. SCARY.


2. Crunch down firmly, but not completely - until you hear a nice 'CRACK'. That's the peel going bye-bye.


3. Plop the garlic clove, now bouncing freely inside its peel,
onto the cutting board or whatever and pop off the whole peel all at once.


4. Throw the peel into the compost sack on the counter that you've been meaning to take out (sorry no photo here - take it from me, not pretty) and smush that nekkid clove right back through the press.

And then do it as many more times as the recipe calls for because HOLY SHIT that barely took a second. And those peels are long gone, gooping it up in the composter, where you barely had to interact with them at all.

No picking around at that last transparent skin stuck all to the garlic like glue. No digging chunks of garlic from under your fingernail from when you went at it a little too hard. No mincing mangled cloves that got a little too smushed under the knife using this method.

No, you're a superhero garlic peeler now and you don't have time for all that nonsense. Put on your blue tights (I love this outfit and now I need blue tights.) and lets make something that calls for a lot of garlic!

And you won't even have to make a vegetable for dinner.
Because it's right in there. Nice.

Kale Killer w/ Pasta
Adapted from Pasta with Kale and Beans from Serving Up the Harvest, Andrea Chesman
My changes in bold

Ingredients
3 T extra virgins
4 large garlic cloves DENUDED and minced
1 t crushed red pepper flakes
1 15 oz can cannellini beans, rinsed and drained
1 1/2 lbs Russian kale, de-stemmed and chopped
1 c chicken broth
1 c shredded fresh Parmesan
Salt and fresh ground pepper
3 cups orecchiette pasta (shaped like "little ears", you know)

To make
Start a sea-salty pot of water to boil.

Heat your oil in a large saucepan THAT HAS A LID over med-high heat. Saute the garlic and red pepper in there until you can smell the garlic but it's not burning.

Your kitchen will smell like spicy heaven.

Stir in your beans, kale and broth. Cover it up and turn the temp to low, letting it simmer for about 8-10 mins. I simmer longer because undercooked kale tastes like hair and no one likes that.

Our farm share has a crush on kale. This is 1/2 a week's worth.

When it goes in, it's big and scary.

When it's done - it's small and not hairy tasting at all.
Cook the pasta al dente once the water boils and drain it. I wouldn't worry about saving any of the water, I've never needed it.

Stir the pasta in with the kale and beans, grind some fresh pepper on there and add some salt - to your taste. Remember, you're adding Parmesan, too, so it could get salty. Which, for me is awesome, I like salt, but you might have an aversion or something. Just be mindful is all.

Be sure to use the wood spoon you got for $1 a Target 10 years ago. Good girl.

Stir in the potentially salty Parmesan and mix it up until its well blended, but try not to smash all the beans. They are very fragile at this point and don't take well to man-handling.

Yes. Your eyes do not lie. That's a cup of Parmesan. Swoony!

Serve it up with some toasted No Knead Bread and a gin cocktail. Or don't - it's your place.

Yeah, this is the same photo. What of it?

I hope you've enjoyed this installment of Finny is a Nutbag and I invite you to please, come again.


You should know that this is also my contribution to March's Grow Your Own challenge on Andrea's Recipes. If you grow, forage, etc your own food and then make things from it that are edible, you can join up! Don't post gross things though, I don't appreciate that.

Tuesday, March 03, 2009

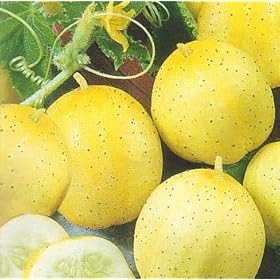
Adopt a Crop 2009: Lemon Cucumbers


I have learned a new thing about you folks that my analytics data can't tell me (Hi Australia! I see you!) - y'all like pickles.

A lot.

Enough to vote them into the garden two years in a row. Crazies, I tell you.

That's something, especially given your other choices, which I thought were good ones. Especially the black tomato/Scary Salsa option - I thought that'd get you for sure - and it would have, if it weren't for those pesky kids and their dog, Pickle Chips.

Wait. Did that make any sense?

Anyway, what I'm saying is that your Adopted Crop for 2009 is the mighty and round Lemon Cucumber and the final product we're shooting for, here, is the burger-ready Pickle Chip.

Don't believe me? This chart snagged on 3/2/09 tells the tale:

So, we had fewer votes this year, but that's OK, I think it really means that there wasn't anyone forgoing their lunch hour for surreptitious voting from coworkers' laptops like I'm sorta sure there was last year.

Not that I minded growing pickling cucumbers last year, we had some tasty renditions at the season's end and I'm still reaping the benefits during our White Trash Hot Dog Dinner nights. We also had some not-so-tasty renditions, but I've since burned those recipes at the stake and warned everyone in my household against muttering their name.

Nonono, I am not dramatic at all.

So, I'm much more ready to attempt to take Lemon Cucumbers from seed to jar than I was at the start of last year's season. In the sense that I finally triangulated the totally illusive but always referenced Pickling Spice. Thank you, Bubba, for pulling this off the shelf at Lunardi's while I was hunting down the other illusive yet wildly popular Vietnamese Cinnamon.

REALLY PEOPLE, why do all these recipes insist on calling for shit I can never find? And it's not like I live in a small town with only a little general store and one donkey or something. I live in the friggen' Silicon Valley for godssake! I should be able to find eye of newt at Safeway on a weeknight is how I see it, but no!

Moving on...

I now have pickling spice. And I have decent pickle recipes that can achieve acceptable pickle-y flavors without the use of pickling spice. And I have jars. And I have verified that my food processor came with an attachment that will slice things into chip form. And seeds for the cucumbers on the way. And the frost date has passed.

Which can only mean one thing - I am behind.

Already.

Because I haven't turned any soil or even accepted delivery of all the seeds that will go into this year's garden yet.

Shit. Shit. Shit.

By 3/10/08, I had the garden turned, planted and watering. And I was also wearing shorts and flipflops and, apparently, leading an amazingly charmed life because I can hardly imagine having all that done in a week's time since right now it is raining (this is good), cold (meh) and I'm wearing 4 inch heels (barf).

Not important! I have seeds coming! And I know what I'm planting in the rest of the garden this year and don't you just want to know?!

Of course.

We're going for a more focused garden experience this year. Specifically, I will not be fucking around with bizarre varieties of melon, falling victim to the allure of plentiful (and buggy - gross) squash, taking up space with ill-fated beets and a few measly radishes or tempting fate by reintroducing bastard chard.

No, this year we're going with a Quantity Over Variety approach.

Bed 1: Silver Queen corn
Bed 2: Kentucky Blue Lake Green Beans, Black-seeded Simpson Lettuce (under the beans), Lemon Cucumbers
Beds 3 + 4: 4 Better Boy tomato plants (twice our typical planting - watch out) and sweet basil

I've never grown corn before, so we'll see how this goes. Thankfully, Kristin gave me some sage corn (sounds weird) advice about soil amending and planting strategies, so perhaps I'm off to a more promising start than, say, last year when I set my cucumber seeds out unsupervised to be mercilessly chewed by mystery bugs while I sat at the computer and blabbed about pickling as though I knew a thing about it which I did not.

*Sigh*

I certainly hope not to repeat that incident because I was so mad I had to make up extra mean swears and I do believe some neighbors decided to steer clear of me after that. Their loss! I'm fun!

Anyway, your crop has been chosen and now the fun and swears can begin.

Monday, March 02, 2009

Craft: along 2009: March

Donk,

Don't worry, if anyone can understand being too absorbed by tomatoes to do anything else, it's me. And, hey, you were trying to do both projects! Such an overachiever.

Me, I only did the one. But I will say - I'm loving my basket.

And by basket, I do mean, the tubTUB for my Smart Balance. It now lives in my fridge, holding securely to my SB (or whipped butter when we're feeling indulgent, which is often) and a butter knife and every time I open the fridge, it makes me a little extra happy.

I'm just glad to see that other people liked this project enough to make it. I was a little afraid that everyone would be, like, Aw crap, I already have a hundred baskets, I don't need another one and then not do the project, but no, you're awesome and so are your baskets.

Nice.

Especially nice, actually was nutsycoco's basket, which I liked very much. Honestly, this is something I would expect to see in a museum or something. Whether it's the fabric or the stitching or the craftsmanship, I dunno, but it's rockin' and, so, nutsy - you win!


Shoot me your full name and address to finnyknitsATgmailDOTcom and I'll ship you off your prize. Congrats!

Now, for March's projects.

Sewing project: Crooked Coasters


Other project: Baking: 5 minute Pizza dough


And don't worry if you want to make them both because I do and, likely, I will, because as soon as Bubba sees that there's pizza dough in our craft: along he's going to begin reminding me about it on a daily basis until it exists as dinner.

It is likely that I will rename it, "Shotgun pizza".

I suppose if you wanted to get all supah crafty you could make a round crooked coaster and call it a pizza coaster and put your 5 minute pizza dough pizza right on it, but I'm not saying you have to.

Just remember to photo your project and add it to our pool so that next month Kelli will have everyone's entries from which to choose a winnah.

And don't you want to be a winnah? I know I do. Sadly, I am out of the running. No matter how awesome my crocked pizza coaster turns out. Not that I'm making one! I don't know yet.

Anyway, have fun this month and let us know if you've seen anything (or any category of things; knitting, embroidery, plush body parts, Splenda crafts) on the Craft blog that you think we should try to include in future months' "Other" projects. And then we will think a lot about incorporating them.

xo
Finny

Friday, February 27, 2009

What tampons? [TUTORIAL & PRIZE]

I think I might have some bathroom issues. Like issues with how the bathroom looks, not how things go down in there.

Don't be nasty.

Like, I used to be irked by the grodiness of the naked trash cans, so I made some nice upcycled Tshirt liners for them, and that helped me deal with that particular bathroom issue: grody trash cans.

But then there's still the issue of the HELLO! I'M A BOX OF TAMPONS RIGHT HERE!, which is almost as annoying. Not that it's grody to see a box of tampons in a bathroom, but it just seems, well, so OBVIOUS HELLO and plus, whose bathroom decor matches teal blue and yellow?

Yeah, not mine.

(And don't just go matching your bathroom to your tampons, that's bizarre.)

So, because I like to create things to make pretty other things in situations where prettying is probably not necessary, I set out to make a not-obvious tampon storage device to un-ugly the teal and yellow box lurking near the trash can in my bathroom.

Because I guess I just couldn't go on another day with that box hanging out there behind the trash can just being all teal and yellow and HELLO! TAMPONS! in my black, white and beige bathroom (aren't I the lively decorator) and just had to find a way to conceal it so I could take My Crazy to a different room in the house.

Again, scary look inside my head. Apologies.

But, if you share this particular nugget of Crazy and would like to soothe it with a quick project that you can probably source from thisnthats around your house, try it out. Really, this thing took no time and barely any fabric, math or patience.

Perfect.
Covert Bathroom Storage
(I get it. Not everyone is YAY! for tampons.)
Print this thing
Materials:


1 8.25" x 23" piece of cotton fabric
1 wire hanger (I recycled a white dry cleaner hanger)
1 30" package white or coordinating 1" Velcro (you won't use the whole package)
Coordinating thread
Scissors
Pins
Wire cutter
Fabric marker

To make

Make the box:
Fold your fabric in half, wrong sides together, matching short edges. Sew the long sides, creating a pocket. Place a small dot 2" up from the bottom on both long sides of the pocket.


Fold pocket in half vertically, so that seams run up the middle of the pocket and bottom corners point down into triangles. (You create the triangles by pushing up at the middle of the bottom of the pocket and folding the corners down.)

Pin through all layers to keep this in place.

Sew a straight line across the corner, lining up your stitching with the mark you made in the previous step.

DON'T SEW BOTH FOLDED DOWN CORNERS TOGETHER.

Fold one corner flap up and sew the first line, then flip pocket over and, holding up the now-sewn corner, sew the other corner, lining up your stitching with the market you made in the previous step.


Turn your pocket right side out. Those folded corners now fold down inside the pocket to form a box.

Fold over about 1/2" at the top of the box and sew to create the top hem.


Make a small cut in the center of one of the long sides of your hemmed box top and zigzag stitch around the cut to keep it from fraying later.


Attach the Velcro
Separate your Velcro and line the short end of one of the Velcro sides up with the cut you made in the top hem.

Keeping the Velcro lined up with the top edge of the box, sew Velcro along the top edge of the box completely.

With the corresponding strip of Velcro, add about 1/4" space below bottom edge of top Velcro and sew this strip below the top strip of Velcro so that when the top of the box is folded over, the Velcro will match up.

Fit the hanger
Using your wire cutters, cut the bottom rung of the hanger off by making two cuts before the wire begins turning toward the bottom rung.

Straighten out the wire completely, leaving the hook intact.


Lay hanger on box and line hook neck up with the notch in the hem.

Begin bending the straight part of the hanger so that it will turn the corner at the edges of the box when the hook neck is centered over the notch.


Then, using the box as a guide, bend the arms again, forming a rectangle.


Place one hand over the rectangular portion of the hanger and, with your other hand, bend the hook upward, toward the rectangular portion of the hanger.

My hands look all manish here. I don't know why. They're very shrimpy in real life.


Holding the rectangular portion and neck still, twist the hook so that it points away from the rectangular part of the hanger.


Fit the bag
Hold the hanger with the neck at the notch in the bag and fold the top of the bag over to stick to the corresponding Velcro on the main portion of the bag.


Rework the bends in the hanger if necessary and add your accessories.


Then hang it on the trash can (underneath the liner, obviously) next to the toi and admire your great covertness.


You're like 007 of the bathroom!

And now we can pretend like it's not all HELLO! TAMPONS! back there. Or whatever you hide behind your trash can.

Oh, about that prize...See, I already made one of these deals a while ago, but my camera died half way through the tutorial making process, so I never posted it, and then had to make it again (this time) so that I could post a tutorial.

So, now I have two of these covert wonders and only one bathroom (sad). So - if there's anyone out there who'd like one of these things, but doesn't have the desire to craft one, you're welcome to it. Just leave a comment like, "I want your tampon box!" or whatever, and I'll pick one person with the random name generator thingee to receive it.

Sound good? And don't worry, the one you see in the photo is actually the one I made the first time, so the one featured in this tutorial has never actually seen any bathroom time. In fact, that's a new box of tampons in the picture, so those hadn't even gone into the bathroom at the time of the photo. What I'm saying is this storage box doesn't have any toi cooties or anything, so don't be afraid or start anti-bacterializing yourself. It's safe.

OK, that's enough about my bathroom for now.

And also please notice the "Print this thing" link at the beginning of this tutorial and on some of my other tutorials and also along the sidebar there. Yeah, right there.

This is so you don't have to, like, set laptop near your sewing machine or, lord help us all, print out my entire mind-numbing wordy blog post just so you can make a bag for your tampons.

I mean, really now. That's something a crazy person might do.

Thursday, February 26, 2009

No more guessing required.

I like you fearless people that guess without fear of me mocking your guesses. You're very brave since you know what a snarky bitch I am.

Brave or not, though, no one guessed right. Sorry, Charlies.

'Member that other thing I planted when the arugula went in? That thing that was supposed to restock the nitrogen in the soil and also make vegetables that I could turn into nuclear green hummus?

My roots are magic.

Yes, it's fava beans. They're blooming! Although not at the rate of my neighbor's plants, which pisses me off since her plants are about 20 feet from mine (with the fence between them), but I can't get too wrapped up in that since some magic is always going down over there anyway and I just don't have access to her magic wand all the time, so boo.

But the plants are blooming and I'm now waiting impatiently for them to start sprouting pods so that I can get to eating the tender little nuggets inside as though I've loved them all my life, even though I only met them last year.

I'll be awesome. You just watch.

We won't tell them that I threw out/composted two bags worth before I figured out how to eat them, OK? Forgive me. I was not wise in the ways of fava back then and I have some shame about it.

OH WELL. New day and all...

So, the favas are blooming and hopefully making future pods so that I can make future hummus and then rip the plants from the ground to make room for one of the beds of tomatoes.

Because you know I'm going to have TWO beds of tomatoes this year. That's FOUR plants. That's DOUBLE the amount of tomatoes I've ever had in a season. Big times, again, big times.

Also, the daffodils are doing a good job trying to pretend it's spring in February and I think you should see this.

We're wicked cute.

And now I don't have any guessing games left to play. But, you do have a few more days to vote on Adopt a Crop 2009 before I crush 3/4 of you with the winner. And right now the Lemon Cucumbers are winning because you're crazy and want me to make pickles again as though you didn't get enough last year.

Hey, fine by me, I actually might know how to make pickle chips at this point and HEY! thanks to my sister I realized that I do have a chopping mechanism in my possession that can make the pickles into chips. WEE! For a while there, I thought I'd have to cut them by hand or else risk losing that hand by using my POS mandoline THAT I HATE no matter what Cook's Illustrated says, to get the pickles into chip form.

Thankfully my sister knows the inventory of my kitchen and also that my food processor came with a device that will make chips from cucumbers. She's a smartie, that girl with her double masters.

SO - go vote on your crop of choice and I'll come back soon with the final tally so we can get to planting. Last frost date around here is Sunday. WOO!

Fuck you, frost. You're SO five minutes ago.